
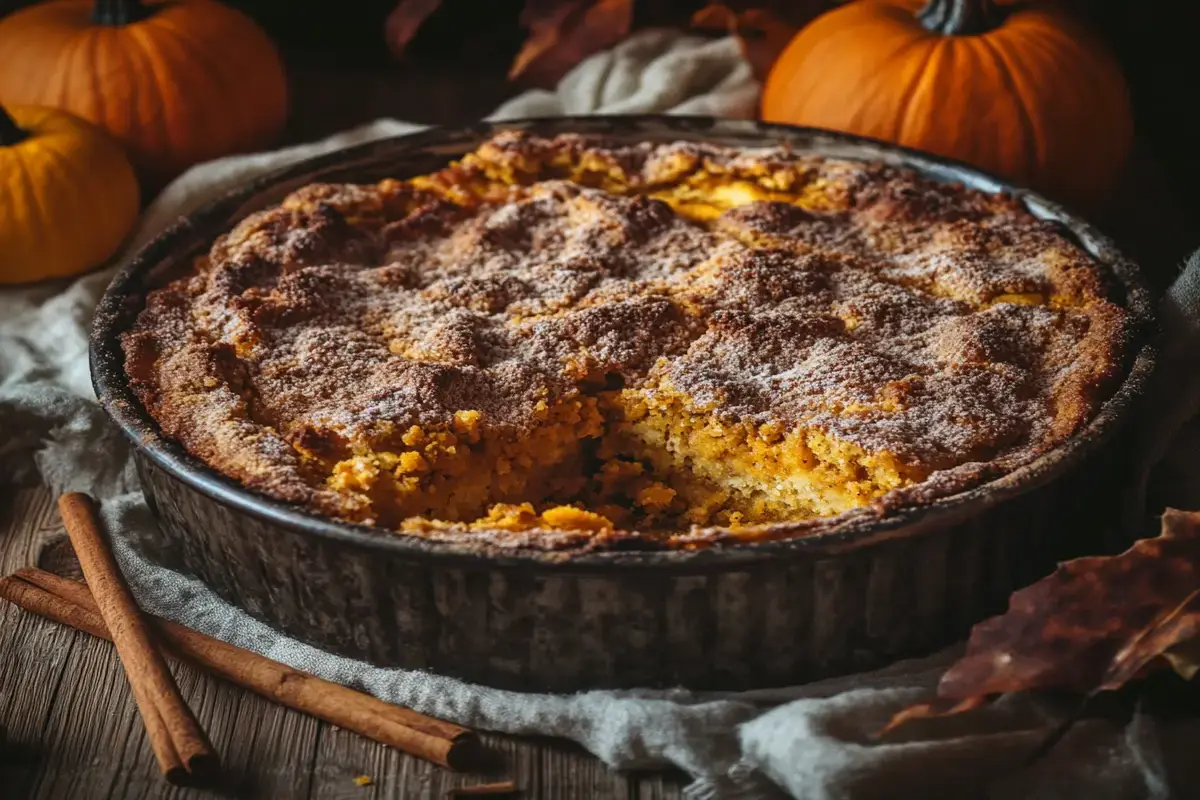
Pumpkin season is here, and there’s no better way to celebrate than with a warm, spiced dessert that requires minimal effort. Meet the pumpkin dump cake recipe—a foolproof treat that’s as easy as it is delicious. Unlike traditional pumpkin pie, this dessert skips the rolling pin and complicated crust, instead layering simple ingredients for a rich, gooey, and crunchy bite every time.
In this guide, we’ll walk you through everything you need to know to make the best pumpkin dump cake recipe, including essential ingredients, step-by-step instructions, common mistakes to avoid, and variations to customize your dessert. Whether you’re baking for a cozy night in or need a quick fall-themed dessert for guests, this recipe is your go-to. Let’s dive in!
Introduction to Pumpkin Dump Cake
What Is a Pumpkin Dump Cake?
A pumpkin dump cake recipe is one of the easiest fall desserts you can make. It’s a cross between a pumpkin pie and a cobbler, featuring a creamy spiced pumpkin filling topped with a buttery, crunchy cake layer. The term “dump cake” comes from the effortless method—simply dump the ingredients into a baking dish, layer them, and let the oven do the rest.
Unlike traditional cakes, there’s no mixing required for the topping. The dry cake mix sits on top of the pumpkin filling and bakes into a golden, crumbly crust. The result? A warm, spiced dessert with a delightful contrast of textures—soft, creamy pumpkin on the bottom and a slightly crispy, buttery layer on top.
Why This Recipe Is a Fall Favorite
There’s no denying that pumpkin desserts dominate the fall season, but this pumpkin dump cake recipe stands out for a few reasons:
- Minimal prep time – No fancy equipment or advanced baking skills required.
- One-pan dessert – Less mess, fewer dishes, and easy cleanup.
- Customizable – Add nuts, chocolate chips, or caramel for extra flavor.
- Crowd-pleaser – Perfect for Thanksgiving, potlucks, or weeknight cravings.
The Simplicity of a Dump Cake
A dump cake is designed for convenience. Unlike traditional layered cakes or pies, there’s no need to mix the dry ingredients separately or worry about getting the perfect texture. Everything is layered, baked, and served straight from the dish. This makes the pumpkin dump cake recipe perfect for beginners or anyone who loves a delicious dessert with minimal effort.
Essential Ingredients for Pumpkin Dump Cake
Choosing the Right Pumpkin Puree
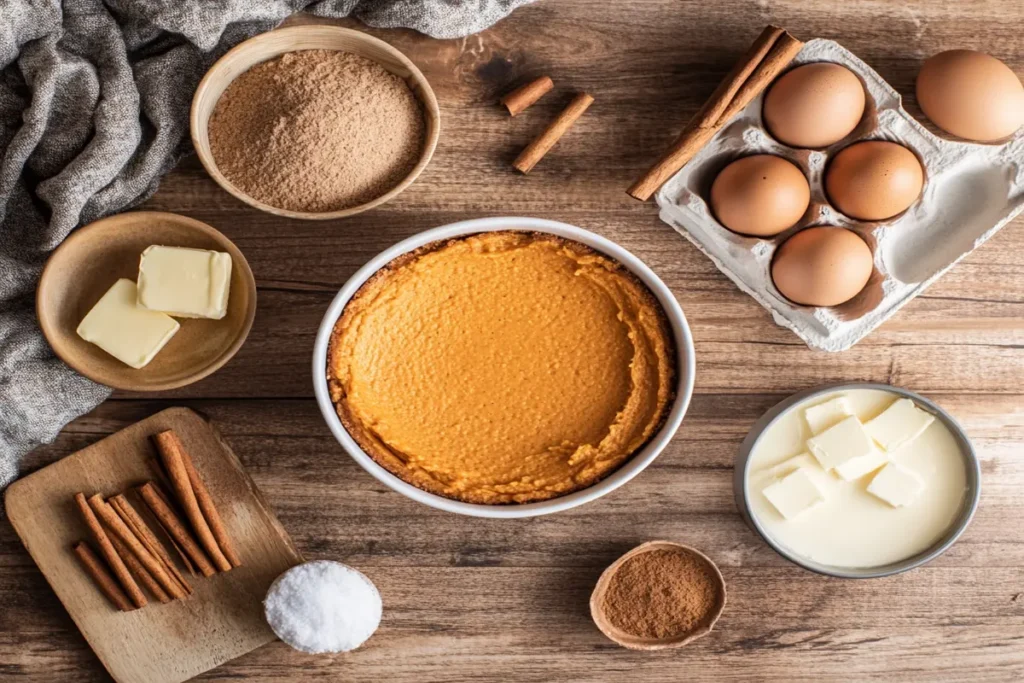
The base of any great pumpkin dump cake recipe starts with high-quality pumpkin puree. Canned pumpkin is the easiest and most reliable choice, offering a smooth texture and rich flavor. Make sure you’re using 100% pure pumpkin and not pumpkin pie filling, which already contains sweeteners and spices. If you prefer homemade, roast a small sugar pumpkin, blend until smooth, and drain excess moisture for the perfect consistency.
The Best Cake Mix for a Perfect Texture
The magic of a dump cake lies in its simplicity—just sprinkle cake mix over the filling and let the oven work its magic! But not all cake mixes yield the same results. For the best texture and flavor:
- Spice Cake Mix – The classic choice, packed with warm spices that complement the pumpkin flavor.
- Yellow Cake Mix – A great alternative if you prefer a more buttery taste with fewer spices.
- Gluten-Free Cake Mix – Works just as well for those with dietary restrictions!
Want to take it up a notch? Try adding a teaspoon of pumpkin pie spice or a pinch of cinnamon to the dry mix for extra warmth.
Optional Toppings and Mix-Ins
Though the traditional pumpkin dump cake recipe is delicious on its own, adding a few mix-ins can elevate the flavor and texture. Consider:
- Chopped pecans or walnuts for a crunchy bite.
- Chocolate chips for a rich, indulgent touch.
- Caramel drizzle for extra sweetness.
- Toasted coconut for a unique twist.
Step-by-Step Guide to Making Pumpkin Dump Cake
Preparing the Ingredients and Tools
Before you start assembling your pumpkin dump cake recipe, make sure you have everything ready. You’ll need:
✔ A 9×13 baking dish
✔ A mixing bowl for the pumpkin filling
✔ A spatula for even spreading
✔ A whisk for blending the wet ingredients
Preheat your oven to 350°F (175°C) and grease your baking dish lightly with butter or cooking spray.
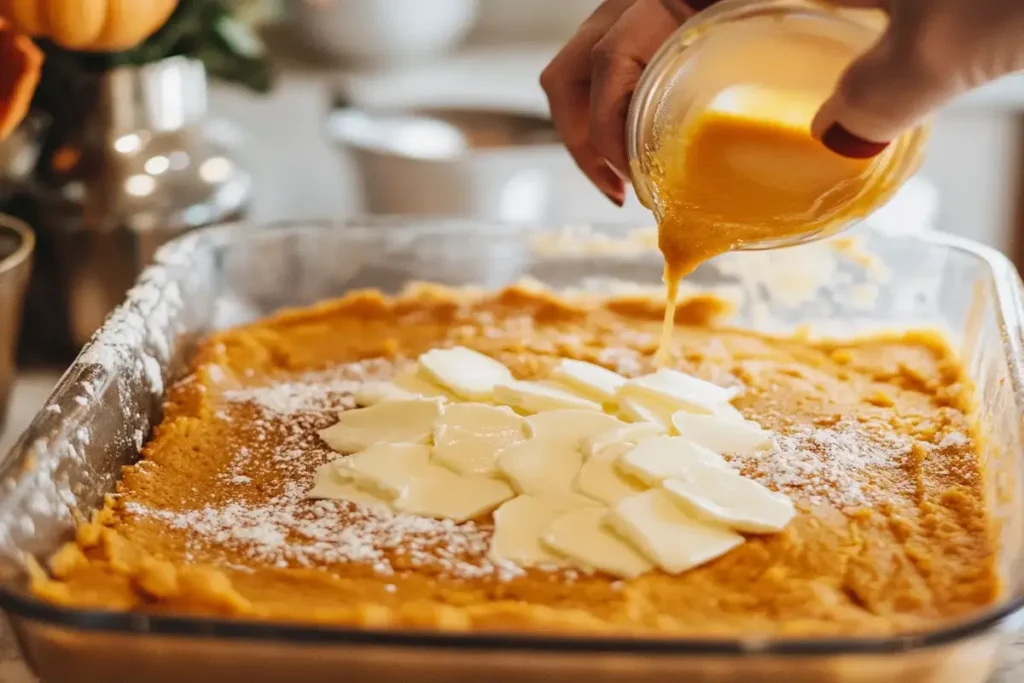
Layering the Perfect Dump Cake
- Prepare the Pumpkin Filling – In a bowl, whisk together pumpkin puree, eggs, evaporated milk, sugar, pumpkin pie spice, and vanilla extract until smooth.
- Pour It In – Spread the pumpkin mixture evenly in your greased baking dish.
- Sprinkle the Cake Mix – Open your box of spice cake mix and evenly distribute it over the pumpkin layer.
- Add Butter – Thinly slice unsalted butter and place the slices across the entire surface to help the topping bake evenly and create a golden crust.
- Add Toppings (Optional) – Sprinkle chopped pecans, chocolate chips, or coconut flakes for extra flavor.
Baking Tips for a Golden, Crisp Topping
- Bake at 350°F for 50-55 minutes, or until the top is golden brown and a toothpick inserted in the center comes out clean.
- If the topping looks dry after 30 minutes, gently drizzle melted butter over it to ensure even crispiness.
- Let the cake cool for at least 15 minutes before serving—it will thicken as it sets!
This step-by-step guide ensures your pumpkin dump cake recipe comes out perfectly spiced, gooey in the center, and crispy on top.
Variations of Pumpkin Dump Cake
The beauty of a pumpkin dump cake recipe is its versatility. You can easily swap ingredients, add flavors, or modify textures to create a dessert that suits your taste. Below are some fun variations to try.
Gluten-Free Pumpkin Dump Cake
If you’re looking for a gluten-free option, simply use a gluten-free yellow or spice cake mix. Some brands offer pre-spiced options, but if yours is plain, just add cinnamon, nutmeg, and ginger for that warm, cozy flavor.
For the best texture, mix ½ cup of gluten-free oats into the topping for an extra crunch. Also, adding a drizzle of melted butter over the cake mix will help create a crispier top layer.
Chocolate Lover’s Pumpkin Dump Cake
Pumpkin and chocolate make an irresistible combo! Transform your classic pumpkin dump cake recipe by:
- Using chocolate cake mix instead of spice cake mix.
- Sprinkling semi-sweet or white chocolate chips over the batter.
- Adding a drizzle of hot fudge after baking for a rich, indulgent touch.
Caramel Pecan Pumpkin Dump Cake
For a gooey, caramelized texture, try this twist:
- Swirl caramel sauce into the pumpkin mixture before adding the cake mix.
- Use chopped pecans on top for a nutty crunch.
- Serve warm with vanilla ice cream and extra caramel drizzle!
Want more easy fall desserts? Check out this banana bread cookies recipe for another delicious treat!
How to Serve and Store Pumpkin Dump Cake
Once your pumpkin dump cake recipe is baked to perfection, it’s time to serve and store it properly to maintain its flavor and texture.
Best Ways to Serve Pumpkin Dump Cake
This cake is best enjoyed warm, straight from the oven, but you can enhance it with delicious toppings:
- A scoop of vanilla ice cream for a creamy contrast.
- Freshly whipped cream with a sprinkle of cinnamon.
- Chopped pecans or walnuts for extra crunch.
- A drizzle of caramel or maple syrup to intensify the sweetness.
For a more elegant presentation, serve it in small ramekins or dessert glasses, layering the cake with whipped cream and crushed nuts.
Storing and Reheating Tips
To keep your pumpkin dump cake recipe fresh:
- Refrigeration: Store leftovers in an airtight container in the fridge for up to 4 days.
- Freezing: Wrap individual portions tightly in plastic wrap and freeze for up to 2 months. Thaw in the fridge overnight before reheating.
- Reheating: Warm leftovers in the microwave for 30-45 seconds or bake at 300°F for 10 minutes to maintain the crisp topping.
By storing it properly, you can enjoy this fall favorite even days after baking!
Common Mistakes to Avoid When Making Pumpkin Dump Cake
Even though a pumpkin dump cake recipe is simple, a few common mistakes can affect the final texture and taste. Here’s how to avoid them for the perfect dessert every time.
What Is the Biggest Mistake to Avoid When Making a Dump Cake?
The most common mistake? Not distributing the butter evenly! Since the dry cake mix sits on top of the pumpkin filling, it needs moisture to bake properly. If the butter isn’t evenly spread or melted before drizzling, you might end up with dry, powdery patches on top.
Solution: Slice the butter thinly and place it across the entire surface, or melt it and drizzle evenly over the cake mix before baking.
Why Is My Pumpkin Cake Too Moist?
A pumpkin dump cake recipe should have a soft, slightly gooey filling, but too much moisture can make it soggy. The culprit? Excess liquid from the pumpkin puree or too much evaporated milk.
Solution:
- Measure ingredients carefully—don’t add extra liquid beyond what’s needed.
- Drain homemade pumpkin puree if you’re using fresh instead of canned.
- Let the cake sit for at least 15 minutes after baking to help it firm up before serving.
Pumpkin Dump Cake FAQs
Should Dump Cake Be Refrigerated?
Yes! Since a pumpkin dump cake recipe contains dairy and eggs, it should be stored in the refrigerator after cooling. Keep it in an airtight container, and it will stay fresh for up to 4 days.
If you prefer to serve it warm, just reheat individual portions in the microwave for 30 seconds or pop it into a 300°F oven for a few minutes.
Why Is My Dump Cake Still Powdery?
A dry, powdery top layer usually means the butter didn’t fully soak into the cake mix. If the mix remains dry after baking, here’s what to do:
- Melt 2-3 tablespoons of butter and drizzle it over the dry spots, then bake for another 5-10 minutes.
- Next time, use a fork to gently press the cake mix into the pumpkin layer before adding butter.
Can I Make Pumpkin Dump Cake in a Slow Cooker?
Absolutely! A slow cooker is a great way to make a hands-off version of the pumpkin dump cake recipe. Here’s how:
- Grease the slow cooker and add the pumpkin filling.
- Sprinkle the cake mix evenly over the top.
- Drizzle melted butter to coat the mix.
- Cook on low for 4 hours or high for 2 hours, until the cake is set and golden.
How Long Does Pumpkin Dump Cake Last?
- At room temperature: Up to 6 hours, but it should be refrigerated for longer storage.
- In the fridge: 4 days in an airtight container.
- In the freezer: Up to 2 months. Wrap individual portions for easy reheating.
Additional FAQs About Pumpkin Dump Cake
Can I Use Yellow Cake Mix Instead of Spice Cake?
Yes! While a traditional pumpkin dump cake recipe uses spice cake mix for extra warmth, yellow cake mix works just as well. To maintain the classic fall flavors, add 1 teaspoon of pumpkin pie spice or a mix of cinnamon, nutmeg, and cloves to the dry cake mix before layering.
What’s the Best Way to Make Pumpkin Dump Cake Extra Crispy?
For an extra crispy topping, try these tricks:
- Melt the butter instead of slicing it—this ensures every inch of cake mix is coated.
- Sprinkle brown sugar and chopped pecans over the top before baking for a crunchy, caramelized finish.
- Bake at 375°F instead of 350°F during the last 10 minutes to crisp up the edges.
Do You Need to Stir a Dump Cake Before Baking?
No! The beauty of a pumpkin dump cake recipe is that you don’t have to mix the layers. Stirring would alter the texture, making it more like a traditional cake instead of a layered dessert with a gooey filling and crispy topping.
Can I Freeze Pumpkin Dump Cake?
Absolutely! Once baked, let the cake cool completely, then wrap individual portions tightly in plastic wrap. Store them in an airtight container and freeze for up to 2 months. When ready to enjoy, thaw in the fridge overnight and reheat in the oven for the best texture.
Conclusion and Final Thoughts
The pumpkin dump cake recipe is the perfect fall dessert—simple, delicious, and packed with warm, spiced flavors. Whether you’re serving it fresh out of the oven with a scoop of vanilla ice cream or saving leftovers for later, this recipe is sure to impress.
With so many variations, from gluten-free to caramel-infused versions, there’s no limit to how you can customize this easy dessert. Now that you know all the tips and tricks, it’s time to preheat the oven and start baking. Enjoy every bite of this effortless yet irresistible treat!